- Open Visual studio and create new Website.
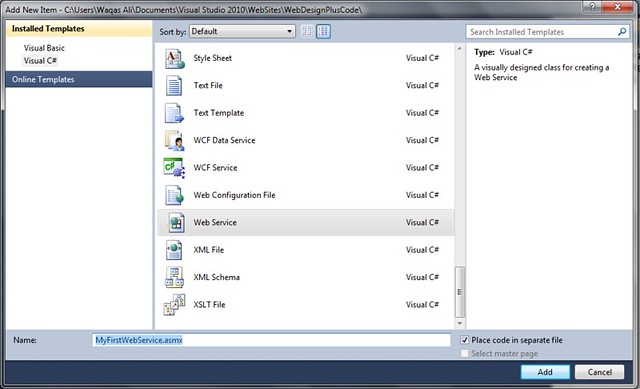
- Right Click on Website and Click on 'Add New Item'.

- A New Window will Open, select 'Web Service' , name it and click 'Add'.

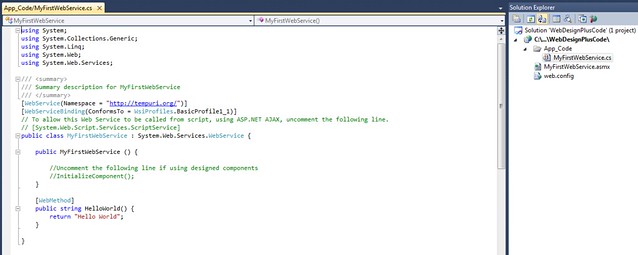
- When you click 'Add' Button, new files ( with .asmx and .cs extensions ) will be added to Project.
- Visual Studio will add some code in it.
- A default Web Method named 'Helloworld' will also be added in it.

- You have created ASMX Web Service Successfully.
- Replace 'Helloworld' Web Method with following code.
- This is Custom Web Method we created for our ASMX Web Service.
In next tutorial, we will learn how to use this Web Service.
No comments:
Post a Comment